If you’re looking for a new way to prepare potatoes that’s both delicious and visually stunning, this method is perfect. These oven-baked potatoes come out incredibly flavorful, with a crispy texture and soft inside. Follow the steps below carefully, and you’ll end up with a side dish that’s sure to impress everyone at the table.
1. Prepare the Potato Base
Start by selecting medium to large-sized potatoes that are as round and uniform as possible. Wash them thoroughly under running water, scrubbing off any dirt. You don’t need to peel them—keeping the skin on adds to the texture and helps them hold their shape during baking.
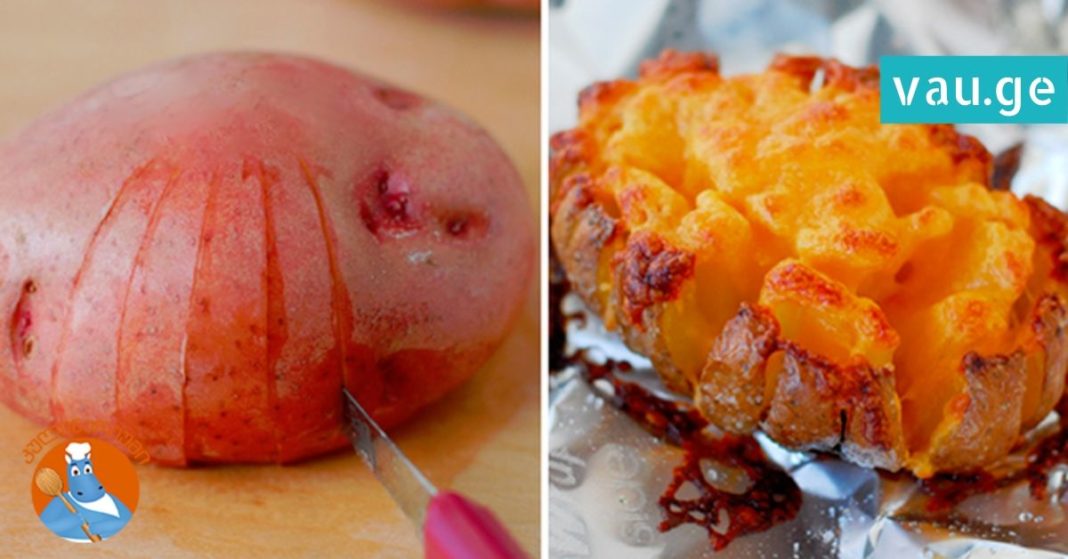
Next, take a sharp knife and thinly slice off one side of the potato. This will create a flat surface so the potato can sit securely on the cutting board without rolling around. This small cut is important for stability and safety while you carve the potato in the next steps.
2. Carve Circular Patterns
Using a small, sharp knife, carefully carve several circular rings into the center of the potato from the top. These rings should be shallow and spaced evenly. The key here is not to cut all the way through—only go deep enough to create surface grooves that will later open up and crisp beautifully as the potato bakes.
Be gentle and take your time with this step. It doesn’t have to be perfect, but try to maintain a steady hand to keep the rings consistent.
3. Make Side Cuts
Now, gently flip the potato over so the flat side you cut earlier is facing up. Carefully make shallow vertical cuts along the sides of the potato, similar to how you would cut a Hasselback potato, but stop before you reach the bottom. The central part (the part shown in black in the reference image) must remain whole and intact to hold the shape together.
This step is essential to create the unique texture and appearance of the potato after it bakes—it allows it to fan open slightly while keeping its core solid.
4. Flip and Shape
Once you’ve made the cuts, flip the potato back over. You should see a slightly sculpted and patterned shape forming—almost like a flower or spiral. Don’t worry if it doesn’t look perfect; the baking process will enhance the shape and texture.
5. Season and Oil
Place the carved potatoes on a baking tray lined with parchment paper. Use a brush or your hands to coat them generously with high-quality olive oil. Make sure the oil gets into all the grooves and cuts. Then sprinkle a good amount of salt over each potato. You can also add your favorite herbs or spices at this point, such as paprika, garlic powder, rosemary, or thyme, depending on your taste preferences.
6. First Bake
Preheat your oven to 220°C (428°F). Once it reaches the proper temperature, place the tray in the oven and bake the potatoes for 30 minutes. This initial baking time helps the potatoes start to soften and the outside to begin crisping.
7. Add More Oil and Continue Baking
After 30 minutes, remove the tray from the oven. Drizzle a little more olive oil on top of each potato. This helps enhance the crispiness and gives the potatoes a golden color. Then return them to the oven and bake for another 30 minutes.
8. Add Cheese and Final Bake
Once the second bake is complete, it’s time to take things up a notch. Generously sprinkle your favorite shredded cheese—cheddar, mozzarella, gouda, or a mix—over the top of each potato. Return the tray to the oven for a final 5 minutes, just until the cheese has melted and turned bubbly and golden brown.
9. Customize with Toppings
Your crispy baked potatoes are now ready to be served! For added flavor, you can top them with crispy bacon bits, chopped chives, sour cream, or any other ingredients you enjoy. They make an excellent side dish for dinner or can even be the main attraction with the right toppings.


